
Objective: Create a fully mapped out character design
I decided to take an original character I had drawn for years and give her a background, life, and friends.


Preliminary sketches and facial exploration
First I sketched out the style in which I wanted her drawn as this would be the base from where the rest of the design grows. From there I studied facial expressions, realistic and cartoon, to create her expression compilation. After I finished Violet, I went on to create her two friends, Ronni and Cale.


After sketching out the characters I had to find their personalities and interests. Each idea and list was written in Photoshop since writing would be faster than typing, even if the outcome is barely legible.


Next came creating a final render of the characters, choosing their favorite colors and style of dress.
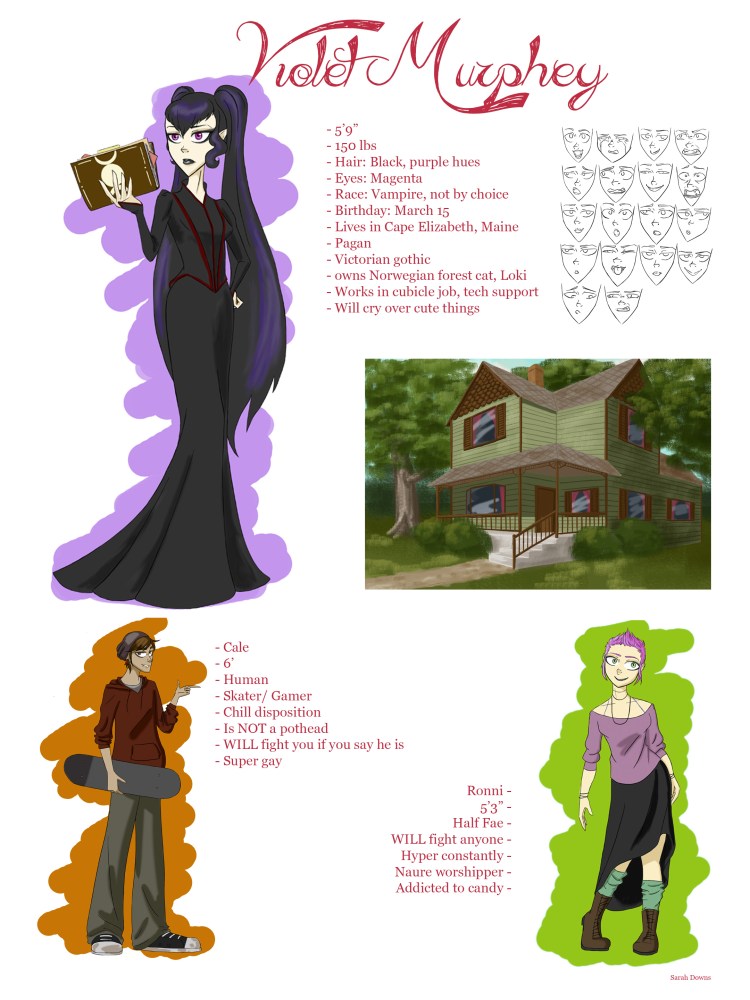
Finally I compiled everything together into one file, including Violet’s house and smaller details about each character.
Two years later for my final capstone project I used these concepts again to create a fully handmade animation.


First was to create a rough storyboard outline in order to make a linear timeline of events.


After creating a model sheet I began to roughly model Violet, the character I thought I could get the most use out of for the video. For her face and body modeling I mainly used Pluralsight to help me remember the exact process.


Next came a more smoothed out version with the addition of hair. I also began work on the hawk that would be featured in my animation as well.


Finally I became ready to UV texture both Violet and the hawk, with the new addition of the spellbook as well. I did have a little initial trouble with the UV of the iris as the tutorial was using an older version of Maya.


Finally after UV I added all the skeletal structure. I did fully rig the face with bones, which worked relatively well for such a simple animation but will be learning how to better control curves in rigging soon. Paint weights should be easy on any model now as I had to weight Violet 7 times. Each time I would miss a piece or Maya would crash. I ended up buying a whole new laptop just for this project.


After the paint weight process I was ready to start staging with all of my trees. Each clump of leaves were handmade, with each tree averaging about 40-50 clumps.


Once I started animating I did run into a couple massive problems. Maya would glitch for a second and peel the skin away from the rigging. I solved this by simply continuously exiting and reopening the program. However one problem was harder to solve. I had accidentally removed the deformer history in an attempt to lighten the project file. This caused the skin and bones to permanently separate. I didn’t want to completely re-skin the whole model so i figured out that if I brought in the originally skinned, non-animated model, and simply transferred the set keys, she went back to normal and no information was really lost.


Finally I was ready for lighting and rendering, at last piecing the whole animation together and adding in all four years of files on Violet to show the entire concept process.
